
A Resource for Audiovisual Preservation!
A Resource for Audiovisual Preservation!
As the CUNY TV Archives makes heavy use of GitHub for their workflows, in my residency I have had the opportunity to learn about more efficient ways to use this tool. GitHub is a service that not only allows for the hosting of information, but for tracking of changes to that information and collaboration. Before I started my residency I took advantage of GitHub to store and distribute scripts across different units in the Library. This was great, however, the way in which I was using it (cut and pasting into the browser window and updating without any comments) made it impossible to take advantage of a lot of GitHub’s functionality, along with creating lots of headaches. Enter GitHub Desktop.
GitHub desktop is a GUI (Graphical User Interface) that enables you to control and keep track of activity on your GitHub repositories. I had actually experimented with it when I first started GitHub, but stopped because I found it confusing. This is because I mistakenly believed that it was used as an editor rather than a means of tracking and controlling edits, an important distinction. Well, enough talking - more rocking! Let’s take a quick look at how to get started using GitHub desktop!
The first thing you need is, not surprisingly, a GitHub account! In creating your account, there are many resources available online to help you pick your hacker name (this step is VERY important). Next, install GitHub Desktop and sign in with your account.
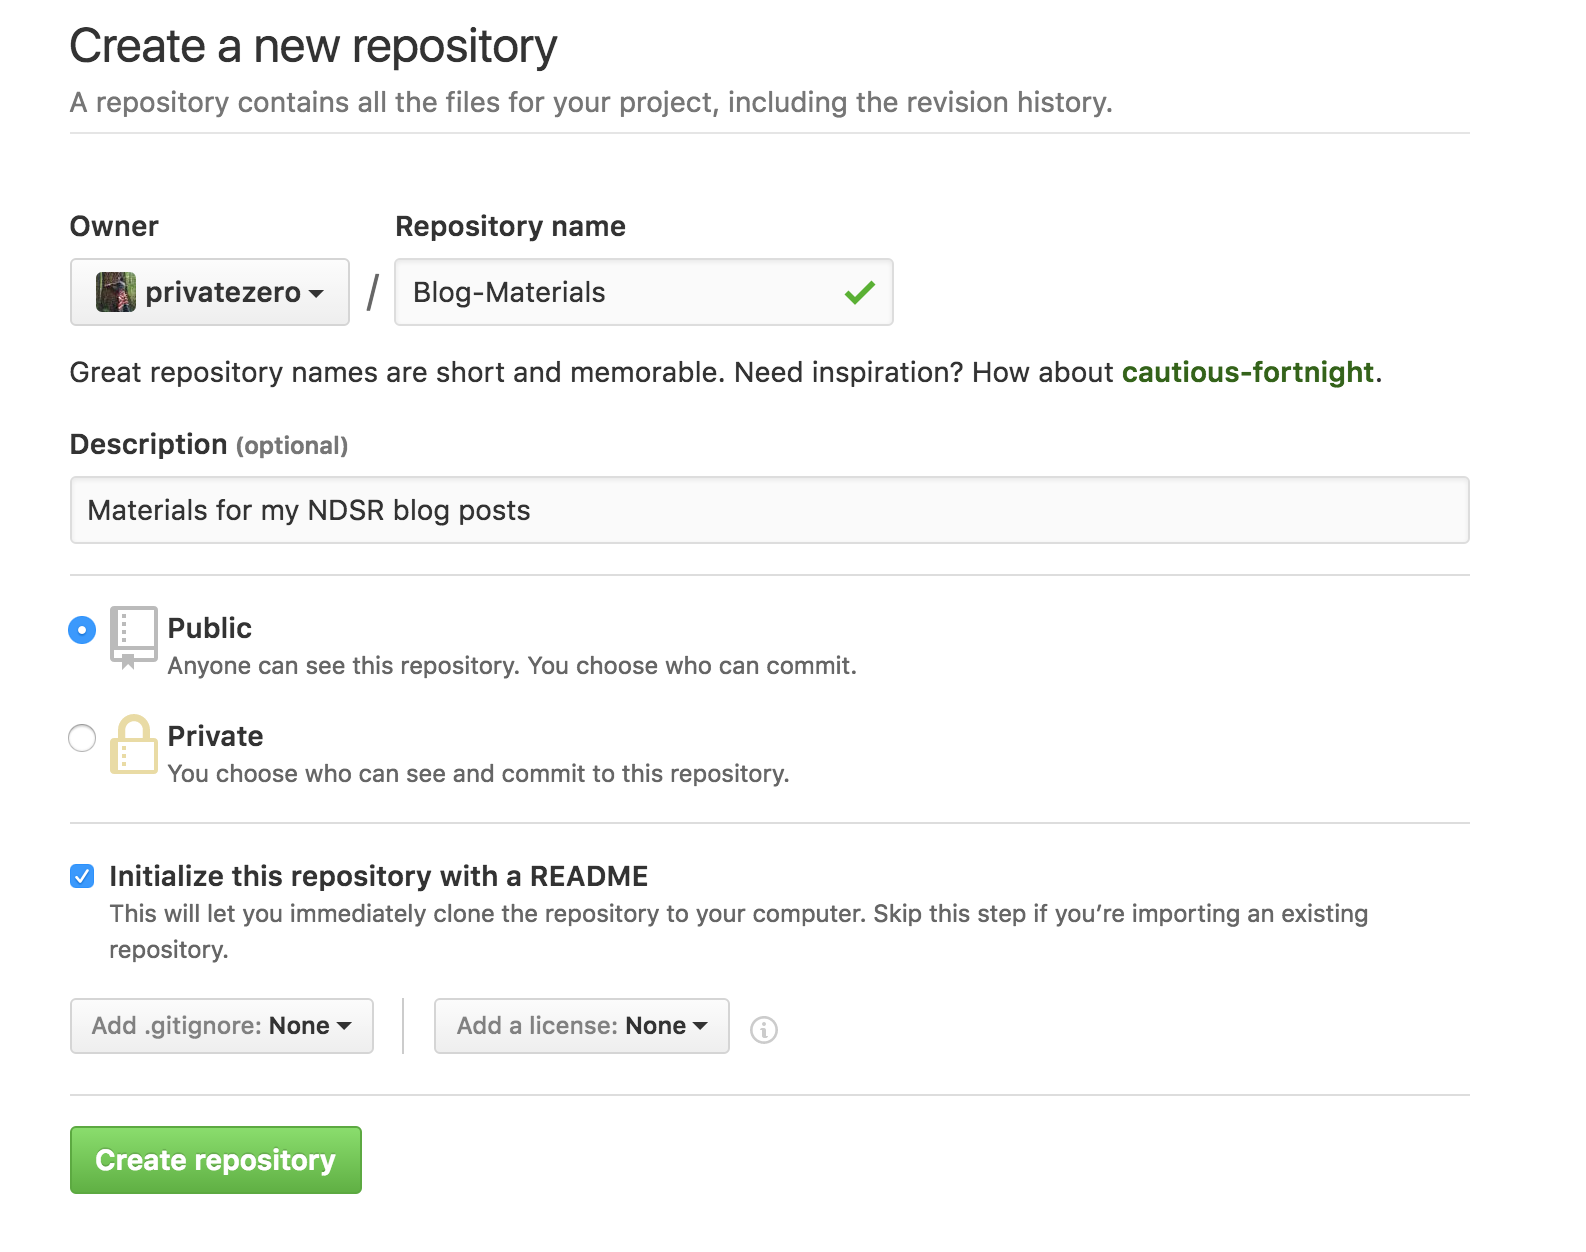
Once you are signed in, try creating a repository (a place where your projects will live) by going to the ‘Repositories’ tab and clicking ‘New’ in the upper left corner. Now you can choose a name and description for your repository. Make sure to check the box for ‘Initialize this Repository with a README’ as this is what we will be editing in this example.
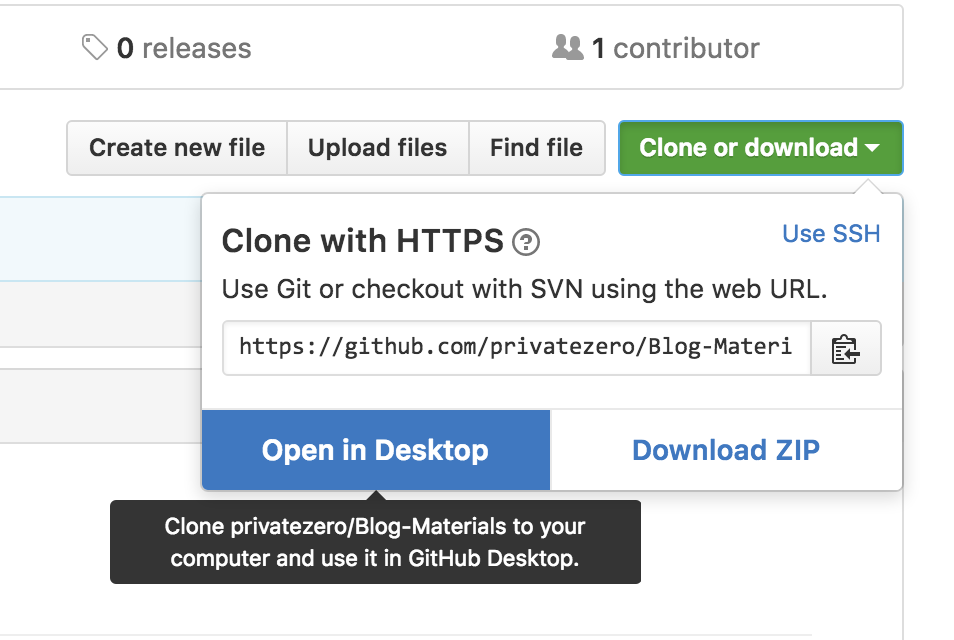
Once you have created your Repository, you can ‘Clone’ it to your computer and manage it with the GitHub desktop application. Do this by clicking the ‘Clone or Download’ button and selecting ‘Open in Desktop.’ Answer yes to the prompts and GitHub Desktop will load. It will ask you where you would like to download the repository; you can use the default or pick somewhere else.
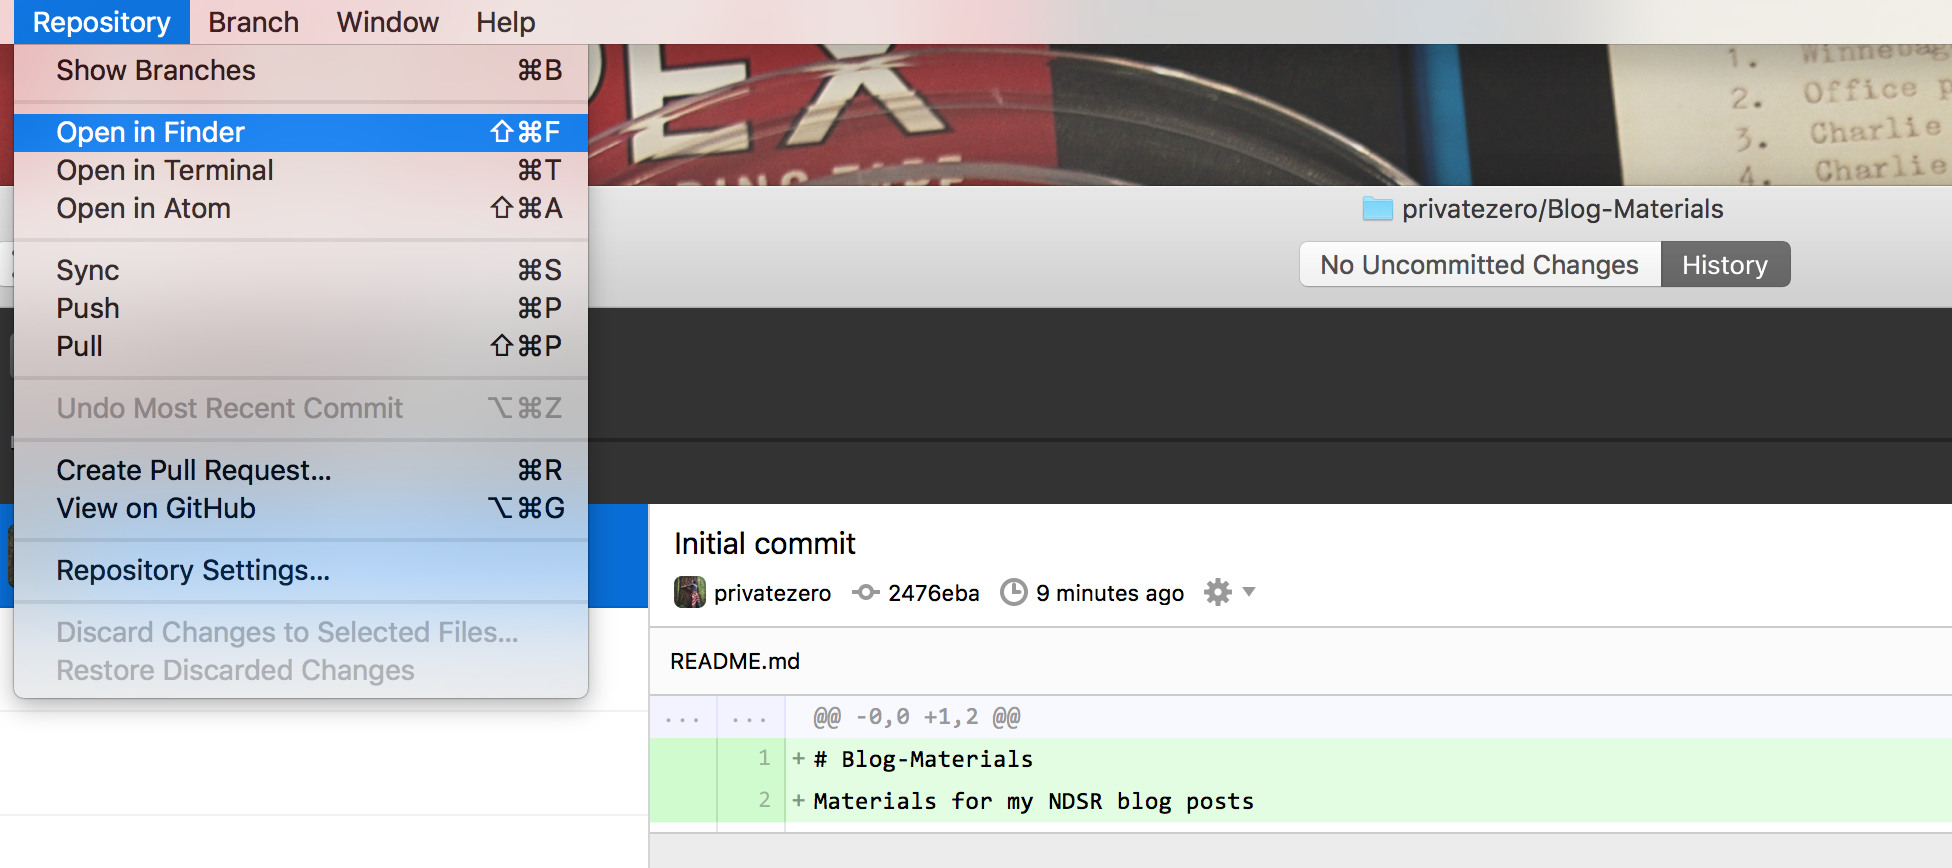
Once you have the repository cloned to your computer, you can start working on it and managing changes! Under the ‘Repository’ menu, choose ‘Open in Finder.’ This should open a folder (your repository!) that contains a file called README.md. Open this file in a text editor.
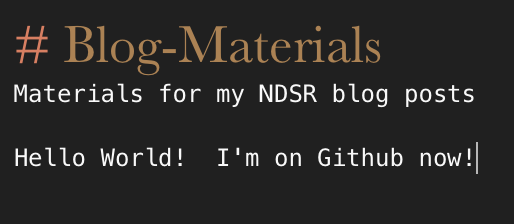
In the text editor you should see a little bit of information already, such as the name of your repository. Try adding something and saving the file!
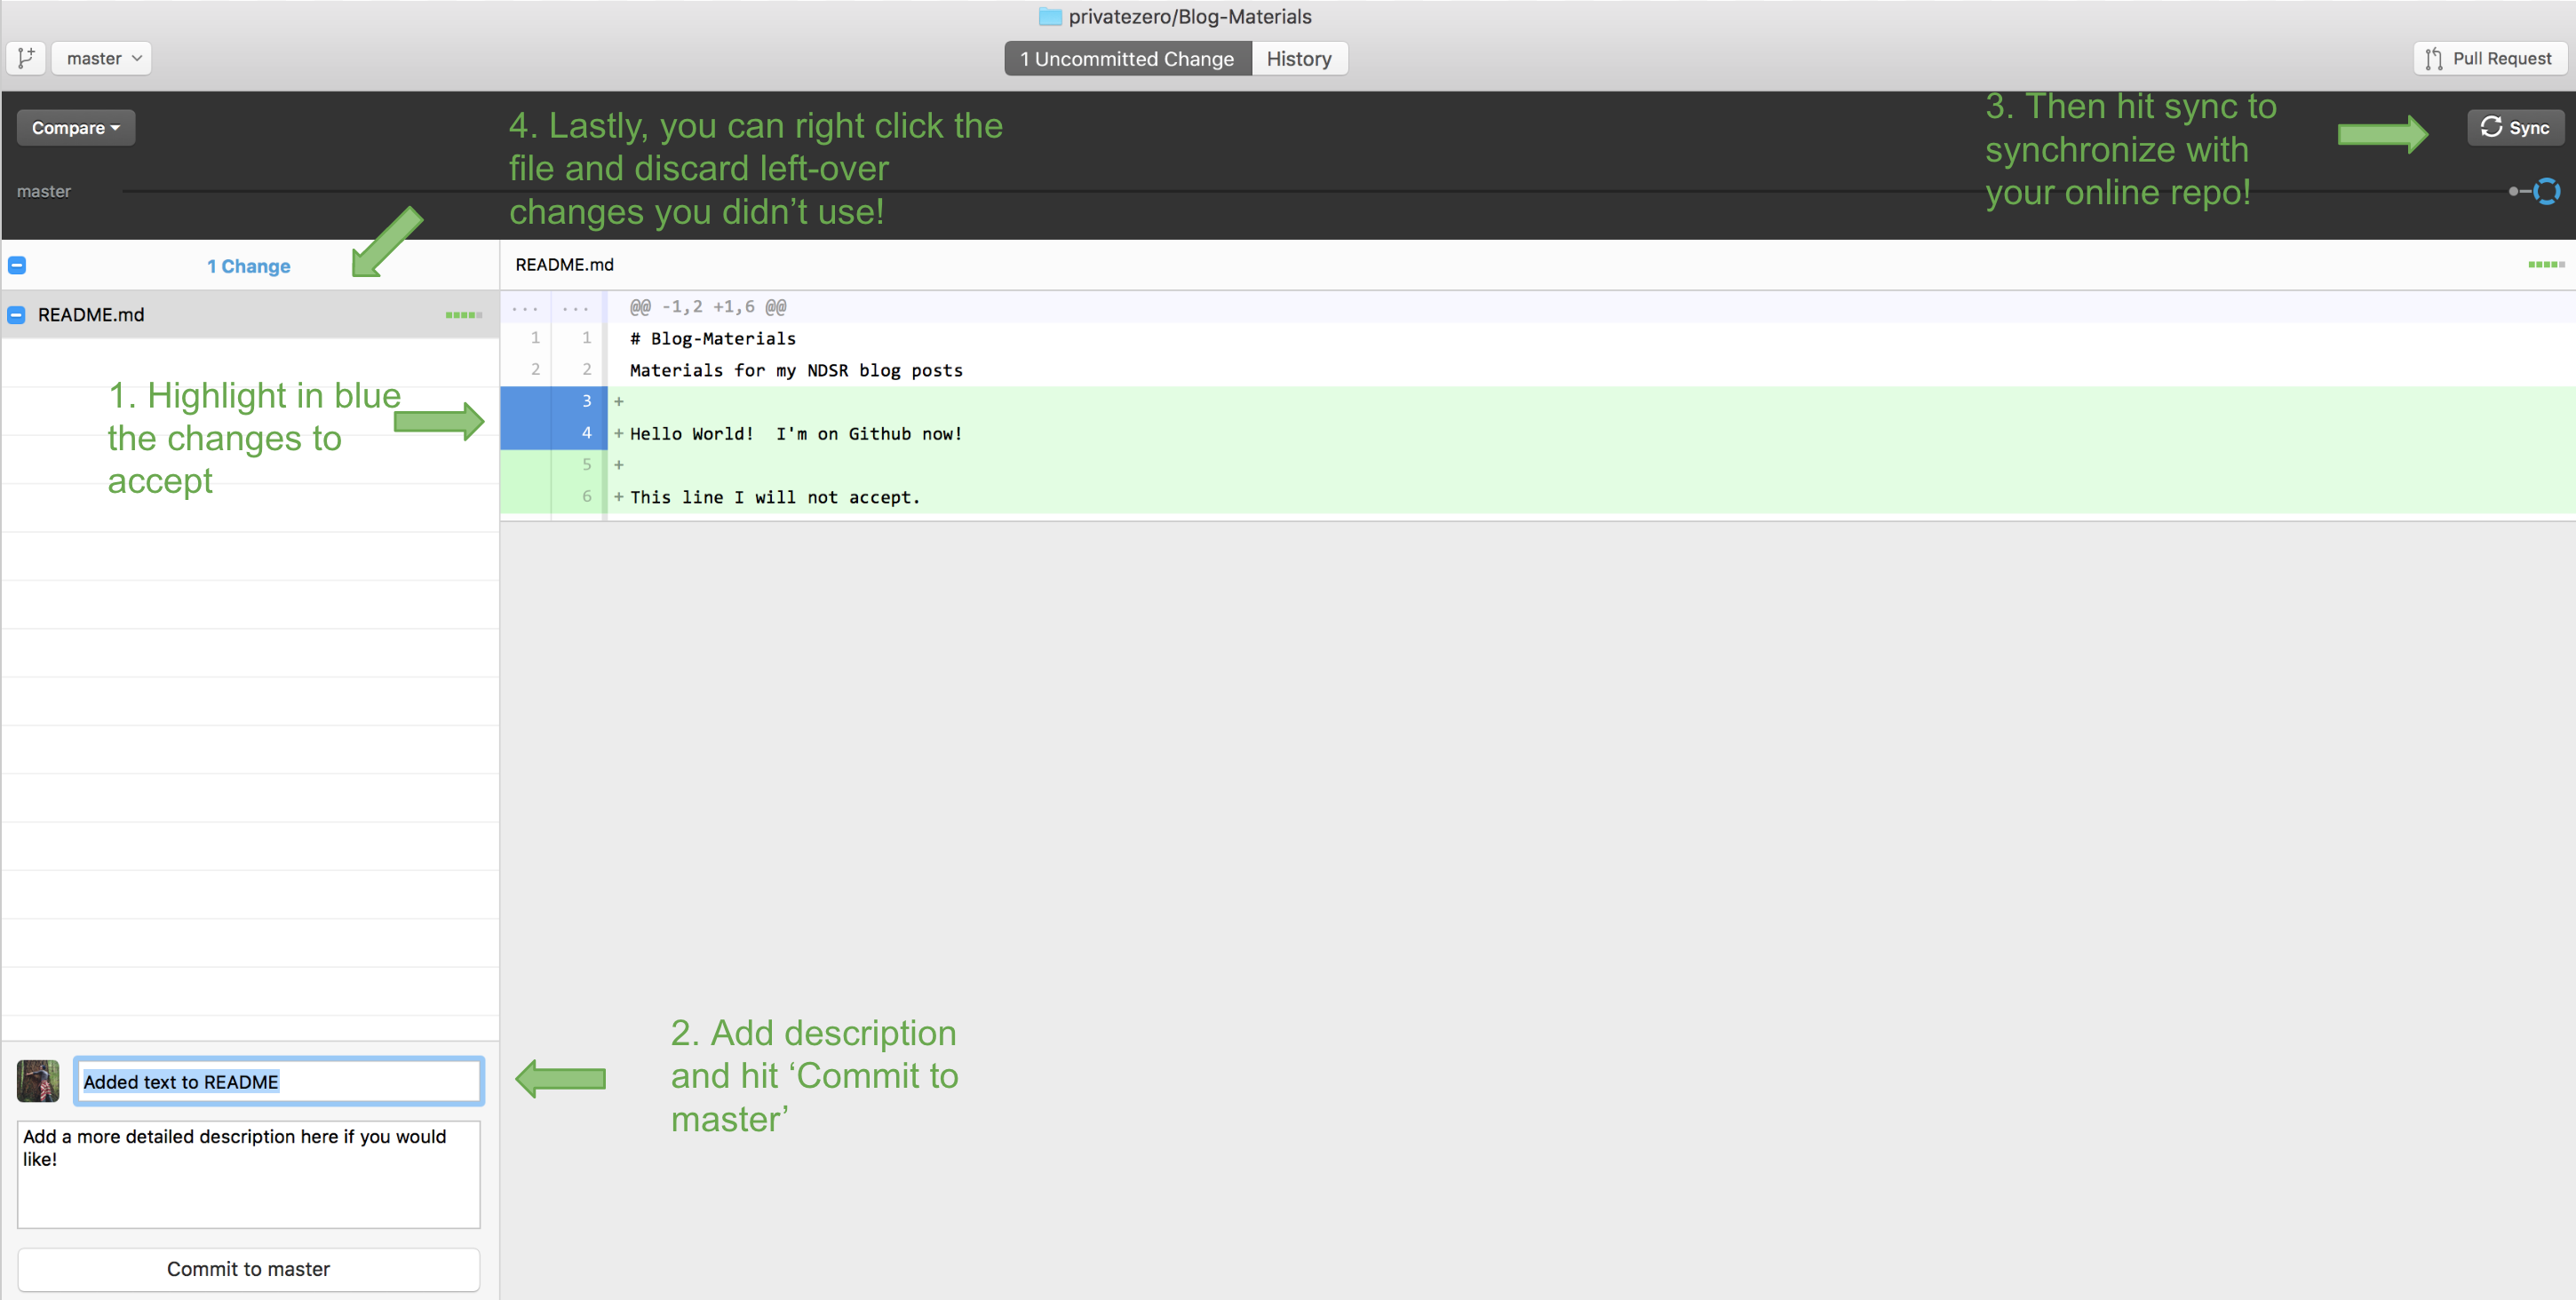
Once you have done this, go back to GitHub Desktop. At the top of the window there should be a button that says ‘1 Uncommitted Change.’ Click on this, and it will bring up a screen that allows you to accept/reject and describe changes made to your file. By default all of the changes are flagged to be accepted. Click on the blue area to deselect them if you wish. Then add a name/description of the change and hit ‘Commit to Master.’ Press the ‘Sync’ button in the upper right corner, and now the changes have been logged and added to your online repository! Try refreshing your repository in your browser and see what it looks like-your changes should be there! Additionally, your change has been recorded in the history of your repository. This will become super useful once you start building something incrementally (or with multiple people).
Obviously this just scratches the surface of how to use GitHub, and there are other ways to manage your repository (such as via the command line) but hopefully it can be a first step towards feeling more comfortable with this tool. It’s hacking time!